QtMultimedia: FATAL: cannot locate cpu MHz in /proc/cpuinfo

This became a problem for my Raspberry Pi (armv6h) running Archlinux (with a relatively newer kernel). Some users of my Grooveshark server reported some bufferring problems where it stopped streaming songs and reported “FATAL: cannot locate cpu MHz in /proc/cpuinfo”.

Since the Grooveshark server is based on Qt5 I thought the new Qt5.3 version had some multimedia library changes that caused the issue, but turned out the issue is /proc/cpuinfo not producing CPU frequency for the ARM based CPUs. But what program is using a proc cpuinfo to determine CPU frequency without getting the value from sys filesystem exposed by the kernel? or using a monotonic clock as per newer kernels, which would provide timing capabilities without depending on system level changes, turned out there are quite a few programs around that depends on the value specified in “cpuinfo” file in proc filesystem. Including “jack” audio server which is a dependancy for QtMultimedia framework and number of other applications.

After hours of searching I came up with the commit that broke this, http://lists.infradead.org/pipermail/linux-arm-kernel/2013-June/178645.html, after reading the mailing list which explains why they have removed BogoMips (bogus mips rating of the CPU) from the /proc/cpuinfo, which gets set in the kernel bootup process for the purpose of setting its internal busy-loop.

How to fix QtMultimedia on ARM

Since qtmultimedia libraries depend on jack audio server for sinking audio-out and jack server being broken because of the removal of bogus mips value, I found out that there is jack2 version which seems to be working fine on ARM based computers, so here is set of steps to get JACK2 (a drop-in replacement for JACK as far as I understand) working on your Raspberry Pi,

Login in as root (if you are running Archlinux)


cd ~
git clone git://github.com/jackaudio/jack2.git
cd jack2
./waf configure --alsa
./waf build # this takes a while
./waf install
cd ..
rm -r jack2
ldconfig
reboot


That’s it, you should not get “FATAL: cannot locate cpu MHz in /proc/cpuinfo” error when using QtMultimedia framwork under ARM (Raspberry Pi, etc) boards.

Interested in kernel level timers and clocks, go on to
http://www.qnx.com/developers/docs/6.4.1/neutrino/getting_started/s1_timer.html
Weekend Project: Pi Music Box – Raspberry Pi as a Music streaming device

Get Grooveshark to run on a Raspberry Pi, Let your friends connect to and vote for their favourite songs. Let the majority rule what you hear at home or office.

We used to play songs regularly at work. Most of the time I play Dubstep while rest of the team want to listen to Trance or a different genre, this is where the clash of genres occur. This is where this system would be useful, if you get this running on a network then you can ask people to search their favourite songs and queue them in the system. Based on the votes they/others make for the song, it may float up or down making it either famous or not-so-famous. This makes a playlist of highest voted or popular songs.

The basic idea of the system is you connect the computer that streams music to a speaker/stereo. The system consists of two applications, one is used for streaming music and controlling the output of songs while the other interface/application takes user inputs via a Web Browser.

Media Streaming Application

Media streaming application is a console based service that runs in a threaded environment (multiple threads) to handle a player and a TCP server to accept user connections and pass user commands to the player to control the music output.

The preferred framework for most of my cross-application development is Qt, so I went with it for this project as well. I used the latest release of it which is Qt 5.1. I have specifically programmed this application to run on single board computers that run embedded Linux which implements a TCPIP stack and GStreamer based audio playback.

If you look at the “grooveshark-server” project hosted in Github you should be able to understand how to get it up and running on a Raspberry Pi, a Beaglebone or any other type of single board embedded computer. I still prefer you to give it a try on your desktop computer first and make sure it compiles correct on your x86 or x86_64 box before running it on ARM based environment.

In a nutshell all you need to do is to get Qt 5.1 running with Qt Core, Multimedia and Networking modules and then run Gstreamer with HTTPs based streaming plugin and mpeg4 decoder (this is found under “gstreamer ugly” package section of your distribution).

User Interface

The purpose of this application is to show a pretty interface to the user and let them search their favourite songs and queue them in the media streaming server, which we discussed above., since the above application only accepts 5 or so commands, this UI shows a eye-candy interface to the user and let them control the playlists and player attributes.

I cheated here, I could have implemented this into the media streaming server as a HTTP server (probably by embedding something like mongoose), implement my own templating engine in C and make it serve dynamic content. Since I wanted to make this project short-and-sweet (preferably finish within a weekend or so — basics :D ) I chose LAMP stack to build the Web based user interface to control the media server. This gives an added bonus of letting it run on the embedded computer (that runs the media streaming server) or another server sitting on the same network (this is achieved via TCP service that media server implements).

UI is build with LAMP stack as I mentioned before. jQuery and Bootstrap 3 is used for front-end content manipulation.

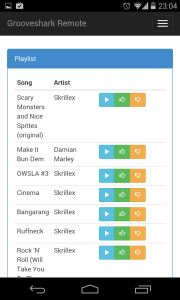
Look below for source code and demo of both applications working together to build a complete media streaming system.

frontpage navmenu search_results

Source
Server: https://github.com/purinda/grooveshark-server
UI: https://github.com/purinda/grooveshark-webui

Demos

Multiple/Second SPI Buses on BeagleBone

How to: Get SPI to work on Beaglebone

If you want just one SPI port running, then most up to date images for beaglebone has enabled them by default.
Location to get pre-compiled images with SPI1 enabled,  http://rcn-ee.net/deb/precise-armhf/v3.2.25-psp20/

Enabling SPI0

Step 1

  • In order to enable userland SPI we need to be able to rebuild the kernel, so grab the Linux source:
    git clone git://git.kernel.org/pub/scm/linux/kernel/git/stable/linux-stable.git
    
  • Install the required tools and libs by running:
    sudo apt-get install gcc-4.4-arm-linux-gnueabi git ccache libncurses5-dev u-boot-tools lzma
    

I tend to compile the kernel using hardfloat, so arm-linux-gnueabihf compiler would be the way to go.

  • As per Robert C. Nelson’s repo, get the patches required to enable spidev
    git clone git://github.com/RobertCNelson/linux-dev.git
    cd linux-dev
    
  • switch to the am33x-v3.2 branch with:
    git checkout origin/am33x-v3.2 -b am33x-v3.2
    
  • Now copy system.sh.sample to system.sh and update system.sh with the settings for your setup:
    cp system.sh.sample system.sh
    
  • For my setup I had to make the following changes to system.sh:
    uncomment line 14, change from:
    #CC=arm-linux-gnueabi-
    to:
    CC=arm-linux-gnueabi-
    
    at line 60 update the path to your linux source, change from:
    #LINUX_GIT=~/linux-stable/
    to:
    LINUX_GIT=~/linux-stable/
    
    uncomment line 70 to set the kernel entry point, change from:
    #ZRELADDR=0x80008000
    to:
    ZRELADDR=0x80008000
    
    uncomment line 80 to set the BUILD_UIMAGE flag, change from:
    #BUILD_UIMAGE=1
    to:
    BUILD_UIMAGE=1
    
    and finally at line 89 uncomment and set the path to the SD card, change from:
    #MMC=/dev/sde
    to:
    MMC=/dev/sdd
    
  • Build kernel command
    ./build_kernel.sh
    

Step 2

Note: This step will discuss how to enable SPI0 (SPI1 is enabled by default with latest kernels, or the one you download from above URL which contains precompiled images).

  • Goto “/KERNEL/arch/arm/mach-omap2” directory in kernel source which is in the clone you got from “ git://github.com/RobertCNelson/linux-dev.git” in above steps.
  • Make the following modification after you get to Kernel configuration menu.
    • Note: if you make the change before you get to config menu, the git update process will overwrite it again with the files from repository.
      *** /home/purinda/Software/Linux/linux-dev/KERNEL/arch/arm/mach-omap2/board-am335xevm.c 2012-08-10 00:12:53.937992451 +1000
      --- board-am335xevm.c 2012-08-09 23:36:24.774040301 +1000
      ***************
      *** 2275,2280 ****
      --- 2275,2289 ----
       };
      
      static struct spi_board_info bone_spidev2_info[] = {
      + /* [PG] I added the following struct call in order to get SPI0 working
      + */
      + {
      + .modalias = "spidev",
      + .irq = -1,
      + .max_speed_hz = 12000000,
      + .bus_num = 1,
      + .chip_select = 0,
      + },
       {
       .modalias = "spidev",
       .irq = -1,
      ***************
      *** 3189,3195 ****
       if(beaglebone_spi1_free == 1) {
       beaglebone_spi1_free = 0;
       pr_info("BeagleBone cape: exporting SPI pins as spidev\n");
      ! setup_pin_mux(spi1_pin_mux);
       spi_register_board_info(bone_spidev2_info, ARRAY_SIZE(bone_spidev2_info));
       }
       if(beaglebone_w1gpio_free == 1) {
      --- 3198,3207 ----
       if(beaglebone_spi1_free == 1) {
       beaglebone_spi1_free = 0;
       pr_info("BeagleBone cape: exporting SPI pins as spidev\n");
      ! /* [PG] I made the following pin_mux call in order to get SPI0 working
      ! */
      ! setup_pin_mux(spi0_pin_mux);
      ! setup_pin_mux(spi1_pin_mux);
       spi_register_board_info(bone_spidev2_info, ARRAY_SIZE(bone_spidev2_info));
       }
       if(beaglebone_w1gpio_free == 1) {
      

Step 3

  • Call ./build_kernel.sh (inside linux-dev directory).

Step 4

  • Call ./tools/install_image.sh
    • you may need to modify system.sh file according to the changes displayed on above.
    • if you have set the correct memory card device in system.sh it will load the compiled driver correctly into the boot partition. In my case the mmc dev was /dev/sdb

How to test

  • Once you boot the new Kernel you should see two devices in /dev/ directory as follows when you run the following command
    ls /dev/spidev* -lah
    
    Output should be
    
    crw------- 1 root root 153, 0 Aug 9 23:58 /dev/spidev1.0
    crw------- 1 root root 153, 1 Aug 9 23:58 /dev/spidev2.0
    
    
  • spidev1.0 is spi0 in beaglebone board and spidev2.0 is the spi1(the default spi master active on precompiled kernel images) in beaglebone.
  • once you can see these two devices you are ready to test.
  • connect pin 18 and 21 in header P9 with a cable, compile and run spidev_test.c in documentation/spi folder in Kernel source (refer to 1st site in references section) to test “spidev1.0”.
  • connect pin 28 and 30 in header P9 with a cable, compile and run spidev_test.c in documentation/spi folder in Kernel source (refer to 1st site in references section) to test “spidev2.0”.
  • When you do so make sure you change make sure you change the following line (in spidev_test.c) to spidev1.0 or spidev2.0, depending on what you need to test.
    static const char *device = "/dev/spidev1.1";
    

Example SPI driver with modifications

Modified am335_omap_spi.c file from kernel source